Resource
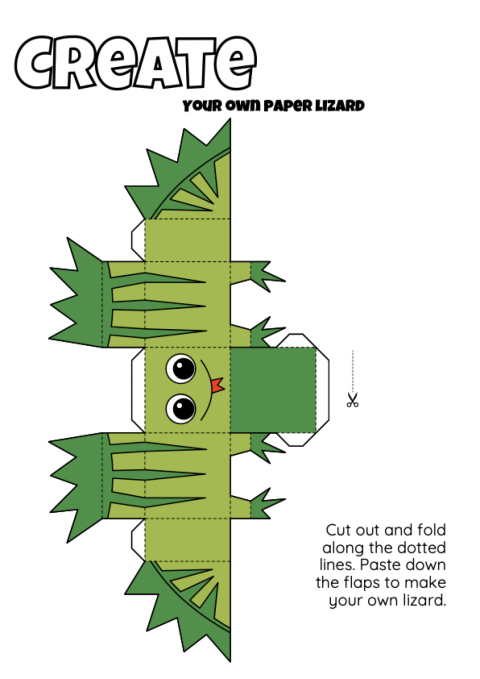
Create Your Own Paper Lizard Box Papercraft
Cut, fold and glue a friendly Lizard character using a polished one-page box papercraft template. Free A4 printable with educator setup and participation guidance.
Download printableCheck the preview, printing notes and licence before use.
What children will make
This one-page craft folds into a small six-sided lizard character. The template includes the connected box faces, glue tabs and any separate character pieces needed for the finished model. Solid lines show where to cut and dotted lines show where to fold.
Prepare the activity
Print the PDF at actual size on ordinary paper or light card that your printer supports. Provide child-appropriate scissors, glue sticks and optional pencils or markers. Make one sample before the session so educators can see how the side seam, top and base close. Allow about 5 minutes preparation and 35 minutes for decorating and construction.
Build the box
- Add names, patterns or theme details while the sheet is still flat.
- Cut only around the solid outside edge, keeping every white tab attached.
- Fold each dotted line forwards and backwards once to make a clean crease.
- Wrap the four side panels into a box and glue the final side tab inside.
- Fold the base panel up and glue its three tabs inside the adjoining sides.
- Add the top panel last, then hold the joins briefly and leave the model somewhere safe to dry.
Adapt participation
Reduce cutting demand: pre-cut the outside shape or complete the corner turns, then let the child decorate, crease and direct the assembly.
Support the sequence: cover later steps and reveal one instruction at a time. Mark each glue tab lightly with a removable dot before folding.
Add challenge: ask children to identify which flat panels become opposite faces, predict which edges will meet, or design another panel detail before assembly.
Useful prompts
- Which lines are for cutting and which are for folding?
- Which panel will become the front, back, top and base?
- Which two outside edges meet to make the first box shape?
Safety and printing notes
Use your service’s usual supervision and procedures for scissors and glue. Collect offcuts promptly and keep wet models away from walkways. Print at actual size for the intended cube proportions; enlarge to A3 if larger tabs and cutting lines would help.