Resource
Butterfly Life Cycle Cut and Paste Worksheet
Sequence the four main stages of complete butterfly metamorphosis using movable, colour-in picture cards. Free one-page A4 colour-in, cut-and-paste activity with educator guidance.
Download printableCheck the preview, printing notes and licence before use.
What this printable teaches
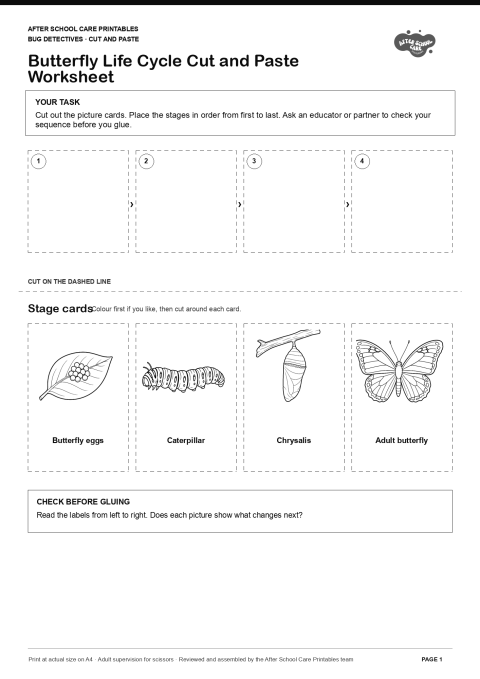
Sequence the four main stages of complete butterfly metamorphosis using movable, colour-in picture cards. The page is a concrete sequencing task: children colour the original line art if they wish, cut out the labelled stage cards, place them in the numbered spaces and check the order before gluing.
Correct sequence
Butterfly eggs → Caterpillar → Chrysalis → Adult butterfly
A butterfly begins as an egg, hatches as a caterpillar (larva), changes inside a chrysalis (pupa), and emerges as an adult butterfly. Explain that the pictures show a simplified sequence: development is continuous, and living things do not all change at exactly the same rate.
Prepare the activity
Print one A4 page at actual size. Provide pencils or crayons, child-appropriate scissors and a glue stick. Allow about 5 minutes preparation and 20 minutes for the activity. Preview the stage order before facilitating so you can check cards without relying on their printed position.
Run it in an OSHC group
- Point out the numbered spaces and ask what the first picture might show.
- Invite children to colour the cards before cutting if they want to.
- Cut around the dashed card borders. Keep all cards loose while children test an order.
- Ask a child to explain one change between adjacent stages.
- Check the complete sequence together, then glue only if the child wants a finished page.
Adapt participation
Reduce fine-motor demand: pre-cut the cards, enlarge the page to A3, or let a child direct a partner who moves the pieces. Gluing is optional.
Add challenge: cover the labels and sequence from pictures first. Then reveal the words and match them. Older children can draw an arrow and label the physical change between two stages.
Keep it sensory-friendly: offer a dry sequence with no glue, use a tray to contain cards and provide a lower-noise table away from busy construction or movement areas.
Useful prompts
- What do you notice changing from one card to the next?
- Which picture gives you evidence that this stage comes before the next one?
- Which features stay recognisable, and which features change or develop?
Safety and pack-down
Use your service's usual supervision and procedures for scissors and glue. Collect small paper offcuts promptly, especially around younger children, then return all tools and recycle clean scraps where your local system accepts them.
Printing notes
The download is a one-page, ink-friendly A4 PDF. Print at actual size for the intended card spacing, or enlarge to A3 when children would benefit from larger pictures and cutting lines.